No one likes muscle aches, but luckily there’s a cost-effective, easy-to-use tool that can offer immediate relief: a foam roller.
Foam rolling has become extremely popular in “pre” and “post” workout preparation, along with recovery sessions. It has become the go-to piece of equipment among those who suffer from general aches and pains, workout-related stiffness, and those who have to sit or stand for long hours on the job.
So, what exactly is foam rolling?
Foam rolling is a form of deep tissue work, also known as direct self-myofascial release (SMR), that relieves muscle tightness and inflammation. By placing a foam roller under certain muscle groups, you can effectively target most muscle groups including your hips, thighs, calves, and upper and lower back.
It increases circulation, aids flexibility, and can also help your range of motion at your joints which is why it has also gained a large following among the older generation.
Think of it as having your own personal physiotherapist at your side with strong hands, knuckles, and elbows. Foam rolling does hurt a bit in certain instances, but that’s normal when you apply pressure to a tight muscle.
The benefits of foam rolling vary for each person, but what’s important is that you use it the right way. Like most exercise equipment, it could cause strain or injury if not used properly. Luckily, if you’ve never used a foam roller before, it’s quite an easy piece of fitness equipment to master.
There are plenty of resources online for learning the basics or you could also ask a personal trainer at your local gym to assist you.
Since foam rollers have become so popular, don’t be surprised if you see classes popping up online and at the gym using high density extra firm rollers
If you already have one and are ready to get started, here are the top six exercises on a foam roller.
1. Calves
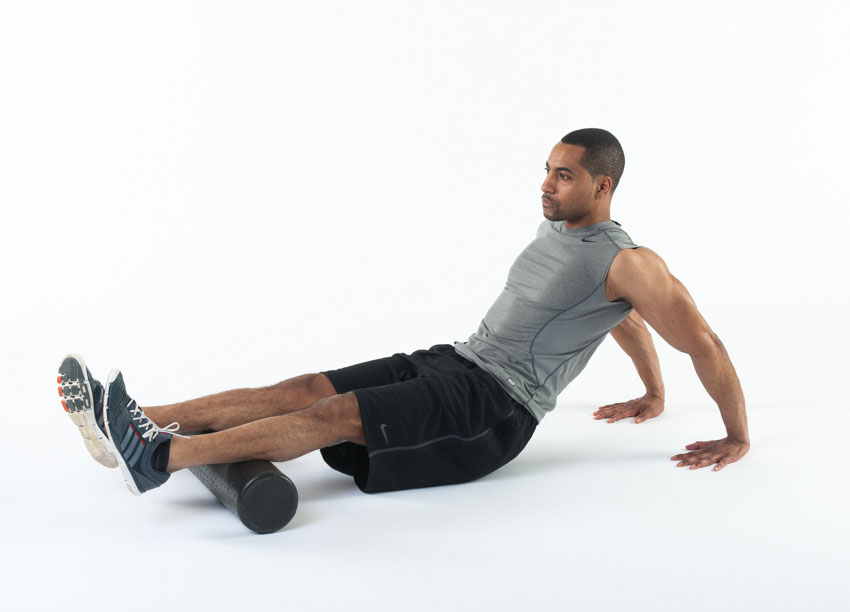 This movement on your calves also helps improve ankle mobility.
How to do it
Sit back comfortably on the floor with your hands firmly behind you and your legs straight out. Place the foam roller directly under your left leg calve muscle, then bend your right leg, placing your right ankle over your shin to add more weight. Repeat this on the opposite side for 30 seconds on each side.
Why you should do it
This exercise is a great one to tackle in the early morning, just after you wake up and start walking around. It’s also beneficial to do after a long day to get the blood circulating.
2. Hamstrings
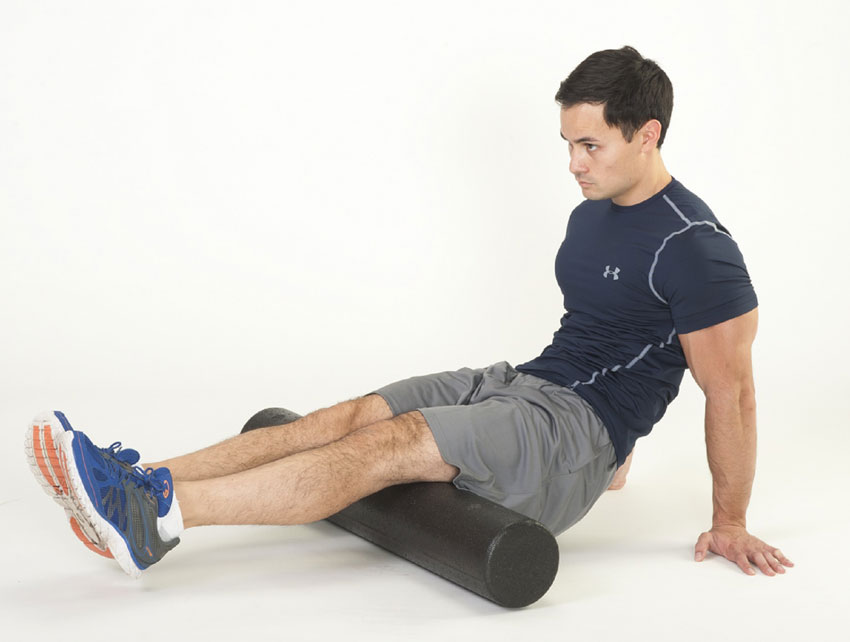
This is great for giving your hammies some TLC.
How to do it
Sit comfortably on the ground with your right leg on the foam roller and your left knee bent upwards with your foot on the floor (almost like the figure four). Place your hands on the ground behind you to steady yourself. Then, roll up and down so that the foam roller moves across your hamstrings. Go for 30 seconds, then repeat the same on the other side.
Why you should do it
This movement is perfect for loosening up your upper leg to improve hip mobility. It’s beneficial for those who sit at a desk all day.
3. Lower Back
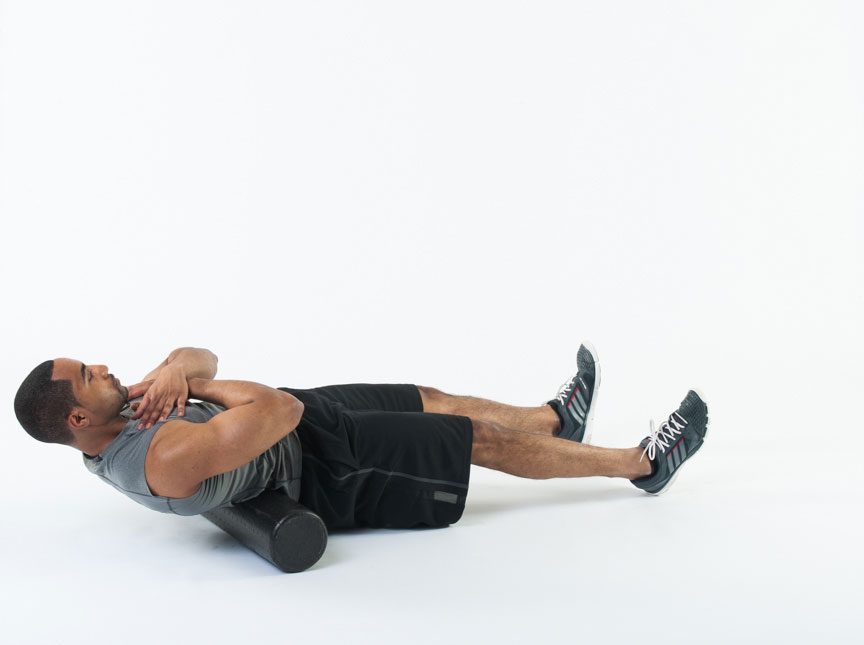
If you suffer from lower back pain, this movement will be worth every ‘ooh’ and ‘aah.’
How to do it
Be extra careful when attempting this foam roller exercise. If you have back problems, consider skipping it. Sit down on the floor with your foam roller placed behind you at your lower back. Place your hands behind your head. Then, slowly bend your knees to move the roller up your back to just below shoulder blades. Rollback to the start and repeat for 30 seconds.
Why you should do it
Lower back pain is quite common and using a foam roller on this area can help reduce tightness and tension. It also offers immediate relief for stiffness from sitting down for too long.
4. Hip Flexors
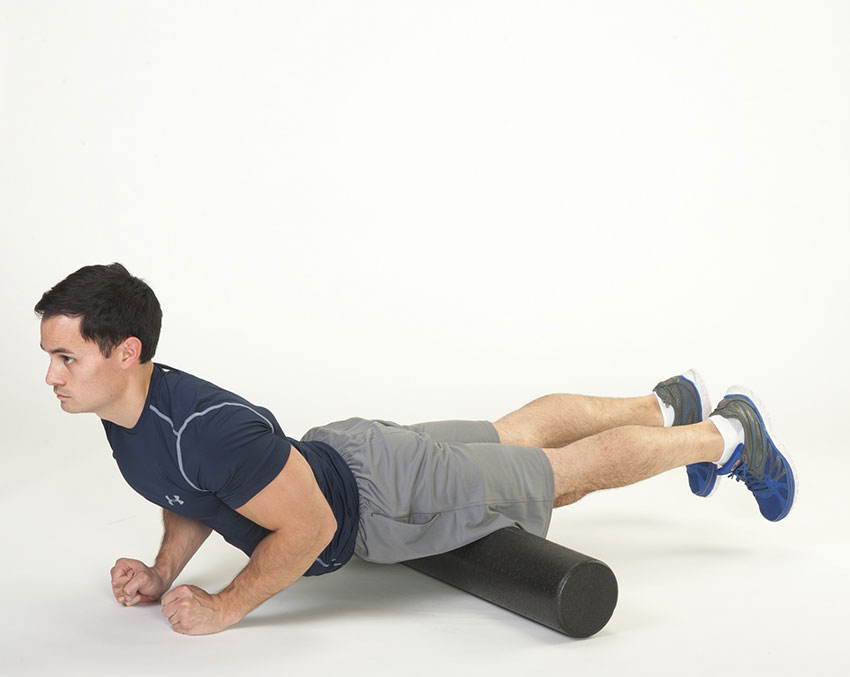
Painful hip flexors? It’s nothing a foam roller can’t help with.
How to do it
Begin by lying down on the floor with your face down in a plank position. Rest the foam roller under your hips. Bring your right leg up slowly and let the foam roller roll up and down. Repeat on the right hip flexor, 30 seconds each side, as always.
Why you should do it
This movement allows the foam roller to get right in and work on loosening your muscle tissue and the connective tissues surrounding it.
5. Upper Back
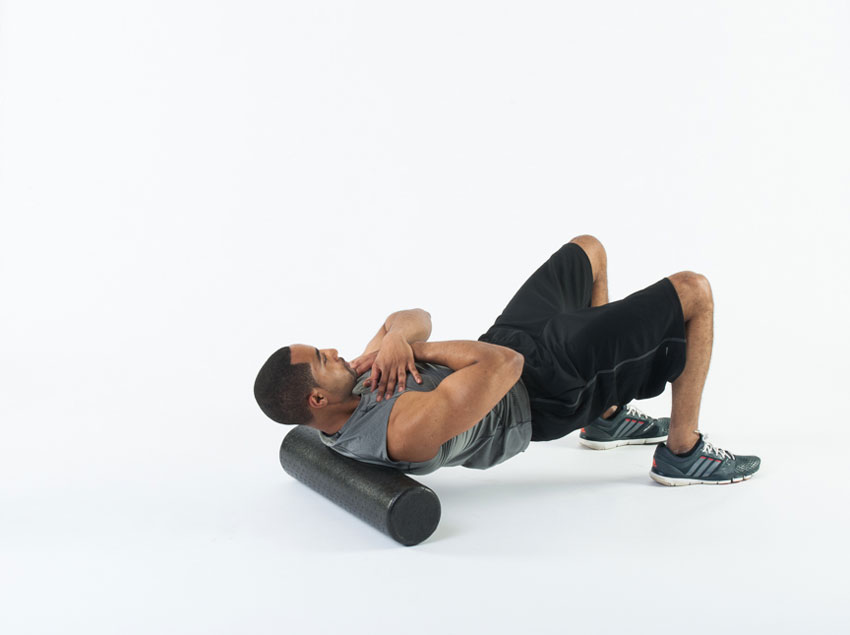
Have you been struggling with tension in your upper back? This simple exercise is fantastic.
How to do it
Start by lying down on your back with the foam roller firmly positioned underneath your upper back. Keep your knees bent with your feet flat on the floor in front of you. Keep your arms by your sides, or alternatively, you can cross them over your chest. Brace yourself into a gentle bridge position, then start to roll up and down from your lower neck to your mid-back. Repeat this for 30 seconds.
Why you should do it
Much like the movement for your lower back, this one targets tension in your upper back area.
6. IT Band
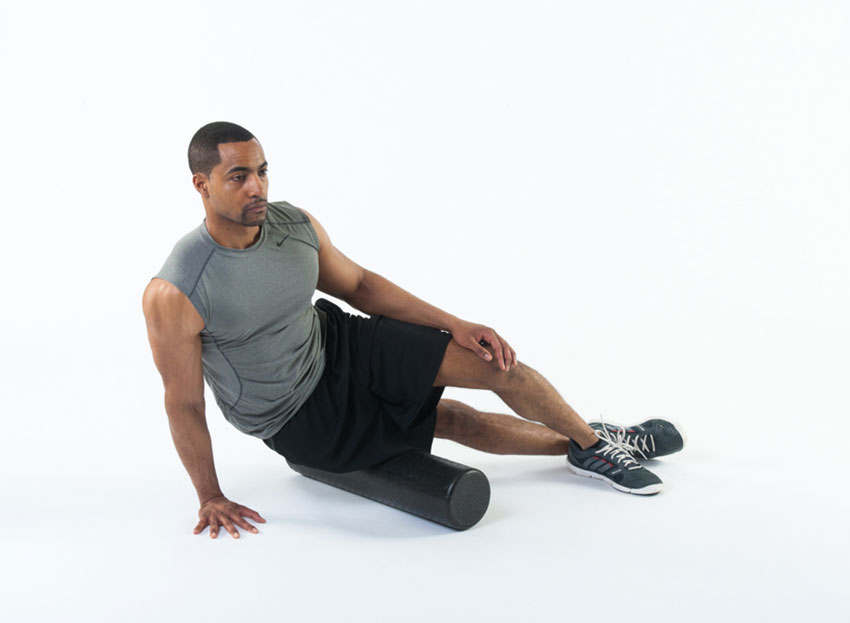
This one targets the hips and knees.
How to do it
The IT band is the part of your body running along your outer thigh from the hip to the knee. For this exercise, start by lying on your right side with your roller positioned under your IT band (or the side of your thigh). Steady yourself by resting on your right forearm and keep your legs out straight. Relax your body weight, then slowly roll up and down along the foam roller. Repeat on your left side and go for 30 seconds on each side.
Why you should do it
This movement is excellent for runners, but it’s also an all-rounder for anyone who experiences pain in this particular region of the body.
In Summary
The great thing about a foam roller is that it can be used at home. This exercise equipment comes in a range of sizes, starting with smaller options to target smaller areas of the body and larger rollers (36 inches) for areas like your back that need more support.
There are also alternatives such as deep tissue massage balls and deep tissue massage stick rollers for targeted relief.
Whichever foam roller you choose, remember to take it ultra-slow and, if you have a back injury, don’t attempt rolling exercises on your own unless your physio has cleared you first.