There’s nothing worse than dealing with acute back pain — that uncomfortable burning, shooting, or stabbing sensation and increased difficulty standing or sitting for long periods of time.
It’s one of the most common medical complaints among older adults, but luckily there’s a cost-effective tool that can offer relief: a stability disc.
Stability discs, also referred to as soft disks, balance disks, or wobble cushions, and can help prevent back pain by strengthening your core muscles. These muscles work together to provide stability in the abdominal and lumbar (lower back) region because building a strong core is key to increased physical performance and injury prevention.
This powerful exercise tool can easily be incorporated into regular workouts and offers a range of additional benefits, which include:
- Enhanced balance and stability over the long-term
- Increased fitness levels without the use of heavy and strenuous weights
- Greater overall strength and lean muscle tone
- Strengthened ankles and knees
- Improved posture and body awareness
Stability discs can also help improve your concentration, have even been used to assist children with special needs and attention challenges, and are a well-known core-fitness device used in rehabilitation.
What’s important to remember when using a stability disc is that you use it the right way. Like most pieces of exercise equipment, it could cause strain or injury if not used correctly. Luckily, if you’ve never used one before, it’s quite an easy fitness tool to master with practice.
Ready to get started?
Below are a few practical and effective exercises you can perform on a stability disc to help with back issues.
Warm Up Balance
Why you should do it: Before launching into the main exercises on a stability disc, it’s good to do a few warm-up movements to get a feel for balancing on the disc while increasing blood flow to your muscles to prevent injury.
How to do it: Start by standing on the disc with both feet. Steady your weight on your right foot, then slowly lift your left leg off the disc, either to the front or side of you. Keep both arms extended out to help balance yourself and maintain this position for 30 seconds. Switch feet and repeat the process. For an added challenge, work up to holding this movement for 60 seconds on each side, and try closing your eyes.
Single Leg/Knee Raises
Why you should do it: This gentle movement is perfect for beginners. Single knee raises on a stability disc can improve your back posture, balance, coordination, and agility.
How to do it: Stand on the balance disc with both feet in line with your hips, body straight, and core tight. Once you’re balanced, slowly lift one leg out to the side at approximately 45 degrees, keeping your knee straight and toes facing forward. Extend your arms out to help maintain balance, or place them on your hips. Pause for two seconds, then lower your leg until your toes barely touch the ground. Repeat this movement roughly 8-10 times, then switch to the other leg.
To increase the difficulty, try lifting your knee in front of you at a 90-degree angle with each movement.
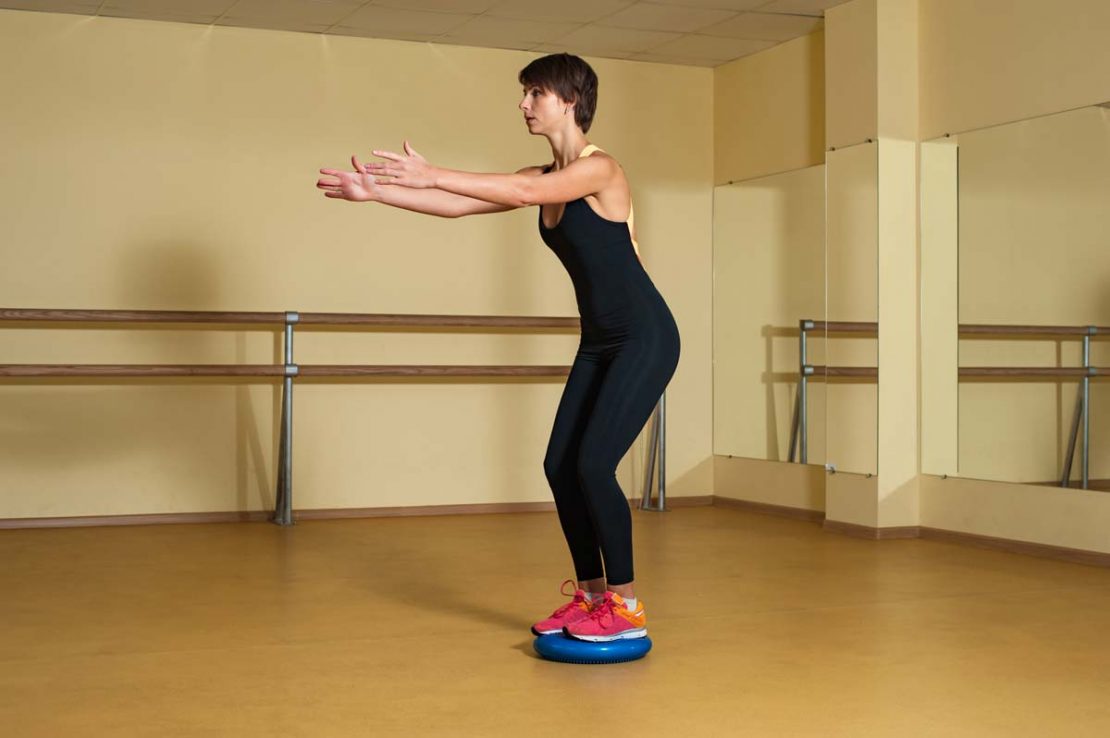
Lunges
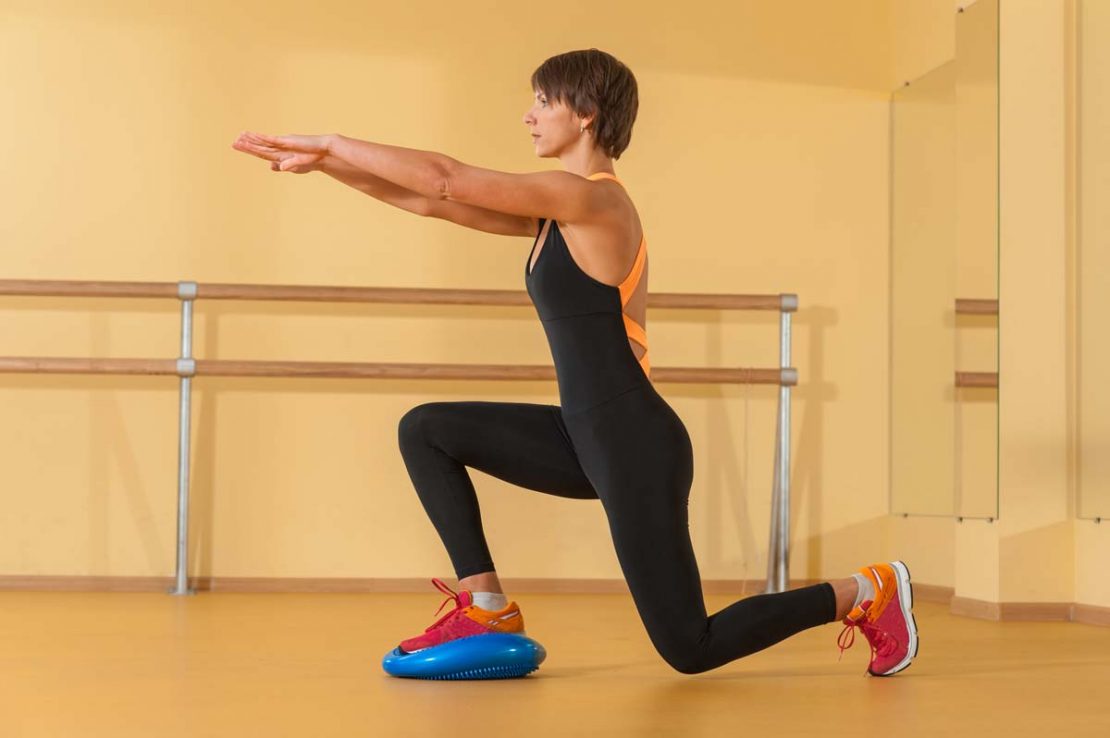
Why you should do it: Lunges are a great movement to strengthen all areas of your legs. This highly effective exercise improves mobility through your hips, legs, and back.
How to do it: Start with both feet on the stability disc, then drive your left leg back while bending your right leg. Try to keep your balance in one fluid movement as you are lower to the floor. Keep your arms on your hips (or straight out in front for an increased challenge). Pause and hold for two seconds, then return to start. Repeat 8-10 times, then switch to your other leg to the complete set.
Forearm Plank
Why you should do it: The forearm plank is an ideal routine exercise to strengthen your core muscles. Building your core strength is one of the best defenses against lower back pain.
How to do it: Kneel in front of the disk and lower your body so that your forearms are braced on the stability disk with your elbows under your shoulders. Extend your legs so that your back is straight and your weight is supported by your toes. Hold the position for 30 to 60 seconds and repeat three to five times with rest intervals of around 30 seconds.
Tri-Point Plank
Why you should do it: This movement is great for switching up a general plank movement that targets your core.
How to do it: Gently get down into a plank position with your hands securely pressed down on the stability disc. Keeping your left foot (toes) on the ground, slowly lift your right leg to hip height just behind you. Keep your leg straight and hold it in position for 20 to 60 seconds. Rest for 30 seconds, then repeat, this time raising your left leg to complete one set. Try to repeat one set three to five times.
Side Plank
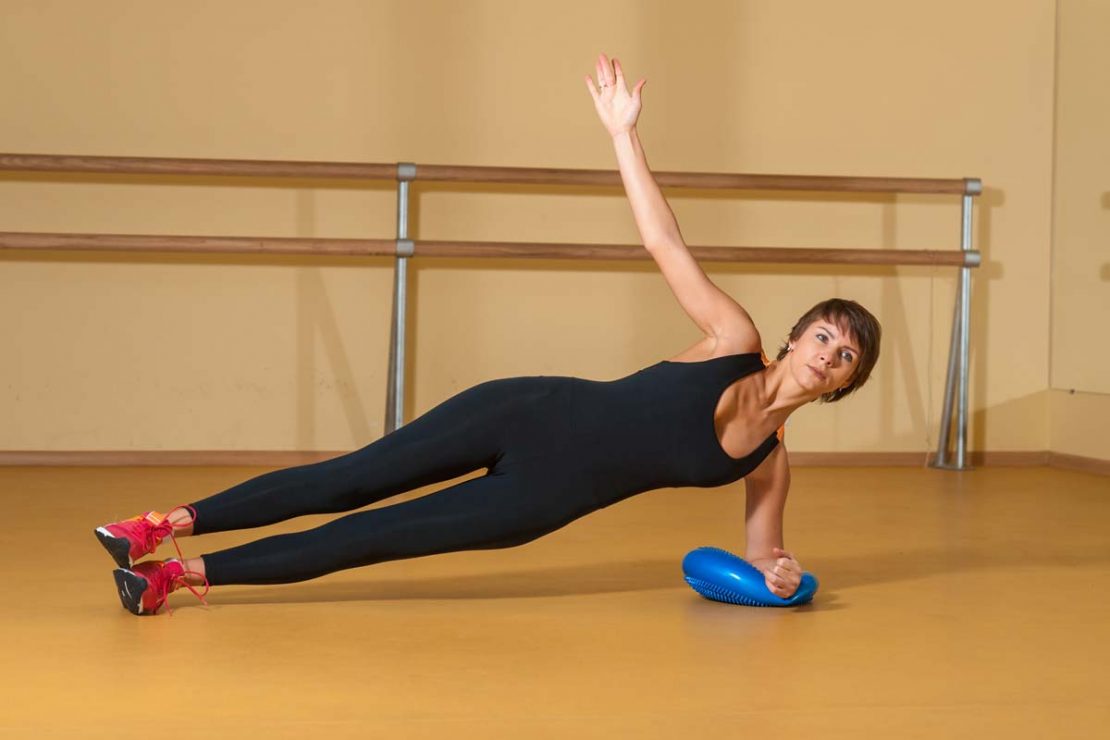
Why you should do it: Side planks are often overlooked even though that they are perfect for your midsection and further conditioning your core.
How to do it: While lying on your side, prop your upper body up onto the stability disc using your elbow. Keep your legs straight, then slowly lift your hips from the floor. Hold yourself at this position for five seconds. Repeat three to five times, each time advancing to get to a 30-second hold if possible. Rest for intervals of 30 seconds in between each attempt.
Elbow to Knee Bird Dog
Why you should do it: The elbow to knee movement, which forms part of the bird dog exercise, is a total body exercise that strengthens the abs, shoulders, glutes, hamstrings, and lower back.
How to do it: For the starting position, begin on your four limbs (quadruped position) with knees aligned to your hips and your hands aligned with your shoulders. With your right knee on the disc, engage your abdominal muscles, draw your shoulder blades together then, raise your right arm and left leg simultaneously. Lengthen the back of your neck and tuck your chin into your chest. Hold this position for a few seconds, then lower back down to the starting position. Then, raise your left arm and right leg, holding this position for a few seconds before returning to the start position. Try between eight to ten repetitions on each side, switching knees on the stability disc.
V-Hold
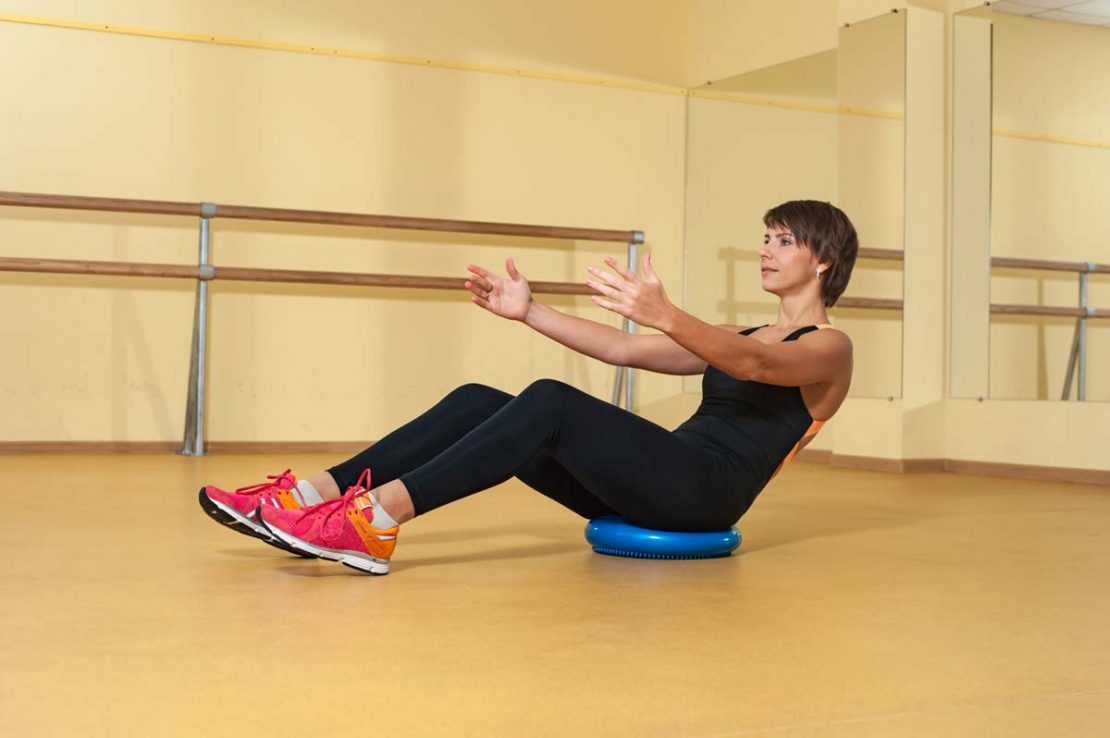
Why you should do it: V-hold exercises are perfect for strengthening and stabilizing your core muscles which assist with supporting your back. It also helps with strengthening the abdominal muscles, which also assists with the stabilization of the spine.
How to do it: With your knees bent and heels on the ground, extend your hands sideways and sit at the center of your stability disk. Lift one of your legs slowly from the ground, keeping it in a bent position. Once you’re stable, lift the other leg until both are about 90 degrees above the ground. Keep your arms up off the ground and hold your legs at this position for no less than 30 seconds. Repeat the movement two or three more times. You could also add extra intensity by holding some light dumbbells.
In Summary
Smaller and less bulky than a stability ball, a stability disc is an underrated exercise tool that’s perfect for adding a balance challenge to your current workouts, and you can even go a step further with stability pods. By incorporating these simple home fitness equipment items into your regular training, you’ll be well on your way to preventing back pain by strengthening your core muscles, supporting your spine.
Just remember that if you’re recovering from a recent back injury, it’s advisable to get the green light from your physician or physio before you begin balancing on your stability disc.