Legs, arms, back, abs, buttocks, the list is endless when it comes to all the areas of the body you can target with a resistance band.
Due to the versatility of this flexible little fitness tool, you’ll have an endless range of home gym exercises to try, making it even easier to switch up your training so you won’t ever get bored!
There’s another best-kept secret about the band, and it’s that you can get a full-body workout in as little as 15 minutes. In fact, research shows that using a band for just a few short sessions a week can improve your balance, gait, and flexibility.
Ready to burn some rubber and sweat? Set your timer and follow our step-by-step guide for a total body resistance band workout that we’ve outlined below.
We’ve laid this series out to best suit a loop band, but you can adjust the movements using any of our resistance equipment fitness products.
Let’s get into it!
Lateral Toe Taps
Band Position: The mid-upper thigh
Focus areas: thighs and outer hip muscles (gluteus medius)
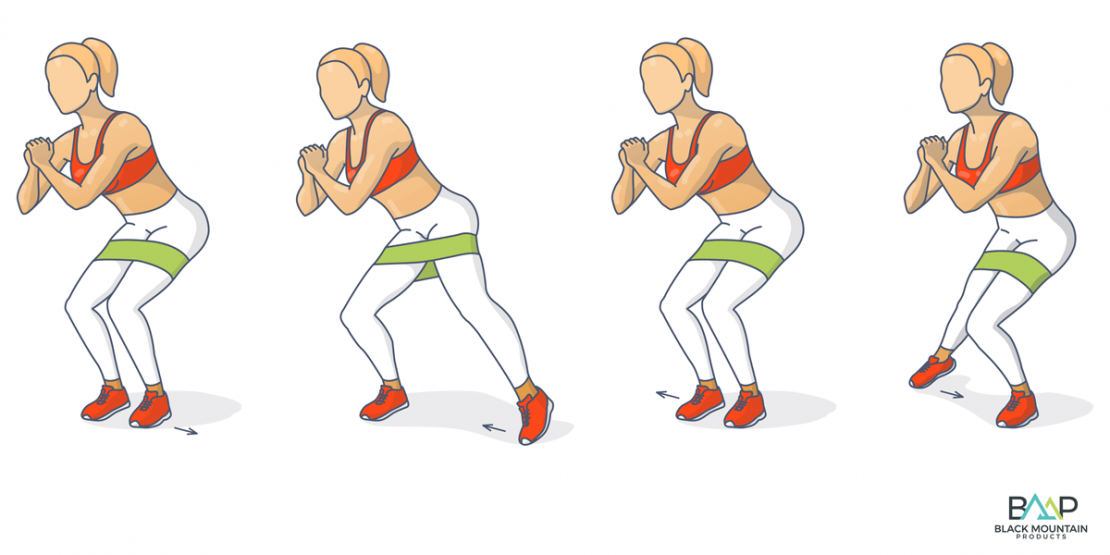
Standing up straight, step into your band and roll it up to your mid-upper thigh. Open out your feet to the same width as your shoulders. Pull your belly button slightly towards your spine (pulling the abdominals in will help stabilize the spine). Tap your right foot out to the right until you feel the tension, then bring it back to the center so that both of your feet are in your original standing position.
Repeat this for 10 taps on each side. You can also switch this movement up by stepping backward with each foot to make it a total leg and glute workout.
Fire Hydrant
Band Position: lower thighs
Focus areas: buttocks
Step into your band, pulling it up to your thighs, just above your knees. Get down onto the floor on your hands and knees.
Pull your belly button in towards your spine, then reach your right leg out to the side until you feel the tension. Return your leg back to your starting position. You’ll soon understand how this movement gets its name since it very much resembles a dog lifting its leg on a fire hydrant (at least that’s a great way of remembering it!)
Repeat this 10 times, then switch out to give the left leg a go.
Banded Clam
Band Positioning: upper thighs
Focus areas: outer hips and buttocks
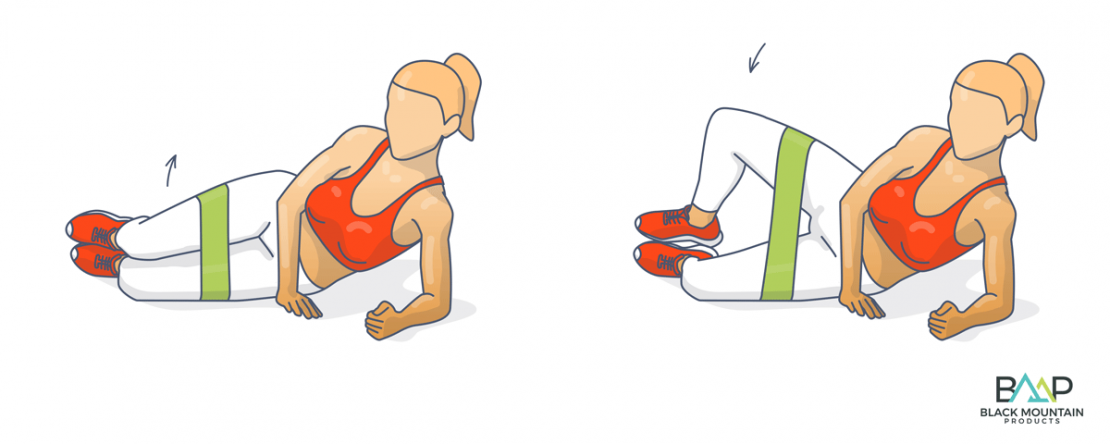
From the fire hydrant pose with the band in the same position, lie down on your right side, then prop yourself up on your right elbow and forearm to steady yourself.
Bring your knees slightly forward (just in front of your hips at a right angle) and keep your legs pressed together. Pull your belly button in towards your spine, then move your top leg up (your left one) away from your bottom knee. This movement should make your legs look like an opening and closing clamshell.
Repeat this clamshell exercise movement 10 times, then switch to your left side.
Banded Criss-Cross
Band Positioning: upper thighs
Focus areas: internal and stomach (external obliques)
Move your resistance band down and secure around your feet (this pilates-style movement works best with shoes on). Lie on your back with your knees bent up and place both your hands behind your head. As you exhale, curl up into a crunch position, leaning your left elbow towards your right knee. As you do so, extend your left leg outwards.
This can be a tough one so take it easy! Switch and do the other side, completing 10 reps on each side.
Lower and Lift
Band Positioning: upper thighs
Focus areas: hamstrings, stomach (lower abs)
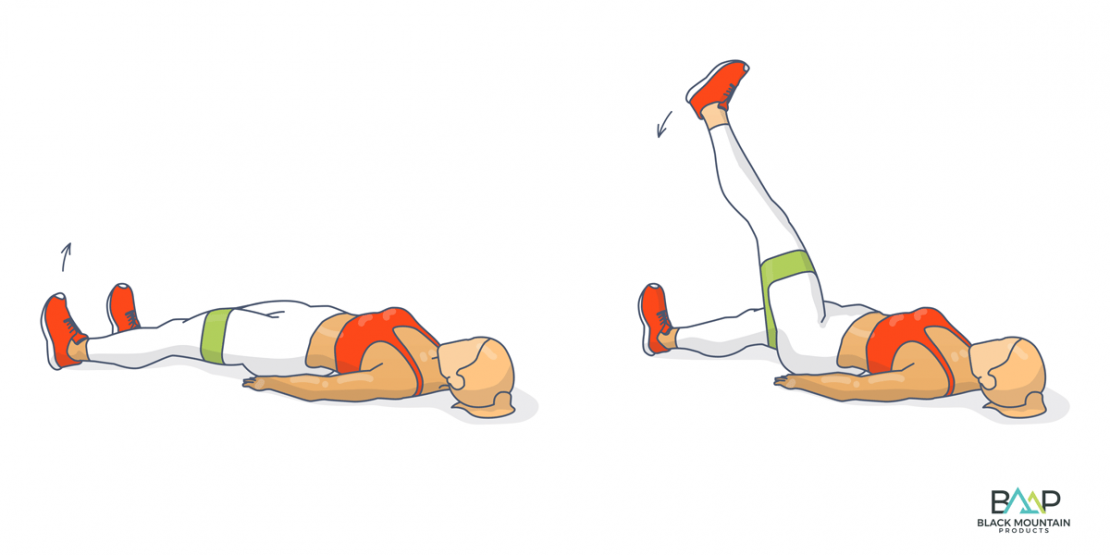
Lie down on your back and wrap the band around your upper thighs. Pull your belly button in towards your spine and reach one leg straight up towards the ceiling. Open the feet wide enough to put tension on the band, and then lower the leg back down as far as you can without lifting your back off the ground. Then, bring the legs back down and repeat with the other leg.
Lower and lift for 10 repetitions on each side.
Bicep Curl
Band Positioning: underfoot and hand
Focus areas: biceps, core
Stand up straight and open your feet to the same width as your shoulders. Step onto the band with your right foot, then pick it up with your right hand, holding it firmly at your side. Using the same hand, with your elbow steady and in the same position, pull your hand up towards your shoulder into a bicep curl.
Repeat 10 times, then switch over to the other side.
Pro Tip: you can save time by doing both sides simultaneously using a single resistance band with two handles.
Banded Donkey Lifts
Band Positioning: mid-thighs
Focus areas: hamstrings and buttocks
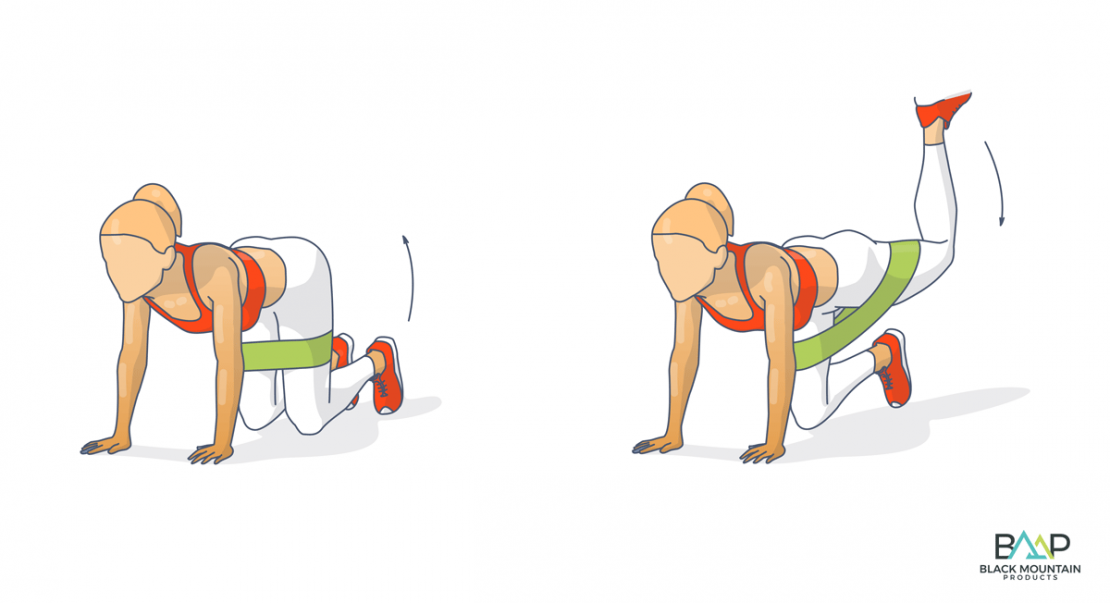
Set your resistance band securely about mid-thigh and get yourself comfortably onto your hands and knees. Ensure that your shoulders stay aligned with your wrists and that your feet are in line with your hips. Lift your right leg off the ground until you feel the tension increase (this should be few inches, depending on your fitness level). Keep your leg bent (or straight for an advanced workout) as you lift, then once you place your knee back on the ground, repeat the movement on the left side.
Repeat each side 10 times.
Bent Over Resistance Row
Band Positioning: underfoot and hand
Focus areas: shoulders, upper arms, upper back (trapezius, rhomboid major, and levator scapulae)
Step onto your band with your right foot, then take a step back with your left leg to get into position. Lean forward slightly, bending your right knee whilst holding onto the band with your right hand with your wrist facing towards your body. Pull the band up, and as you do so, pull your right shoulder blade towards your spine until you feel the tension, then release.
Pull up and release for 10 reps, then give your other arm a turn.
Squats
Band Positioning: lower-mid thigh
Focus areas: legs, core
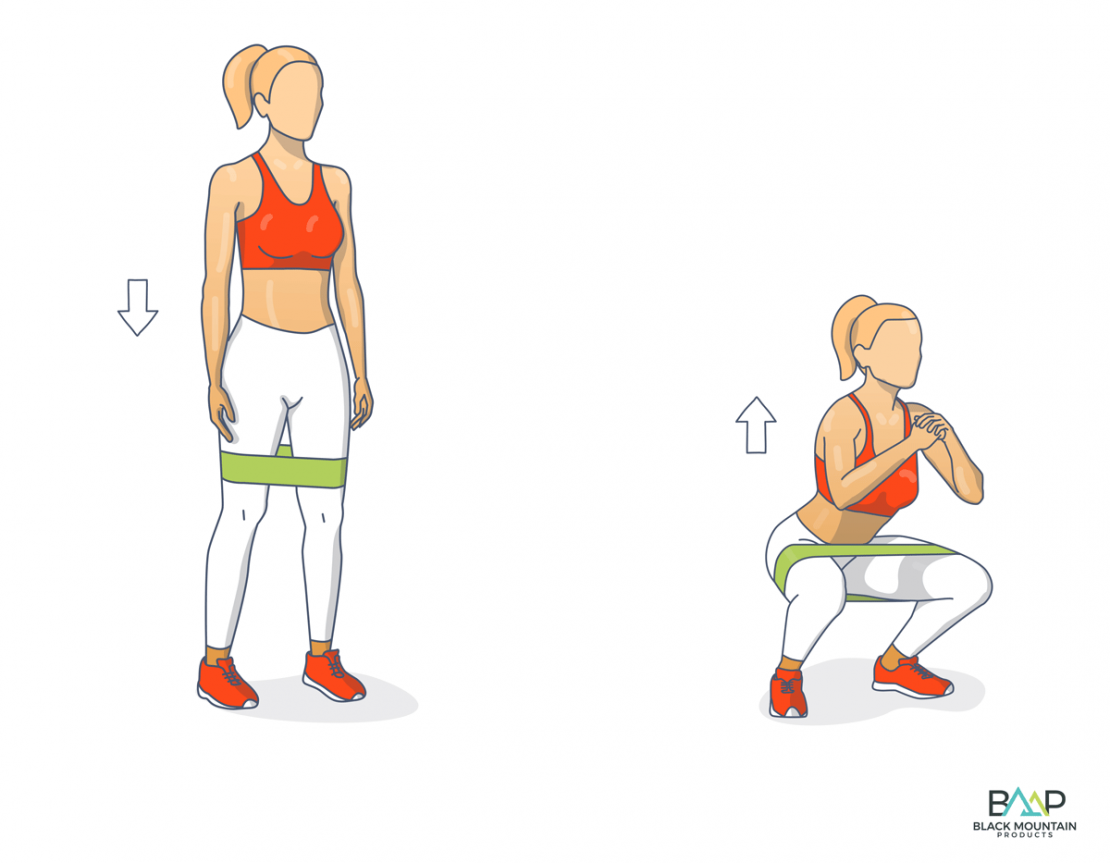
Place your loop band above your knees, toward your lower thigh. Set your feet shoulder-width apart and engage your core. The classic squat exercise will tighten and tone all areas of your legs, including quadriceps, hamstrings, calves, and buttocks. Keep your back straight as you lower yourself down, keeping your hands in front of you while keeping your feet flat on the floor. Think of sitting down in a chair. For added intensity, you can “pulse” at the bottom before rising back to the top.
Repeat 10 times.
Shoulder Side Raise
Band Positioning: forearms
Focus areas: shoulders, forearms, upper back, core
Start by standing firmly, your arms parallel to your body, with your elbows bent at a 90-degree angle. With your resistance band secured around your forearms, pull your arms out to either side of your body. Try to go as high as your shoulders. Remember to keep your elbows bent as you work through the movement.
Remember, you can do this routine at the gym, your home, or your hotel room at any time. Feel free to adjust it slightly to suit your fitness levels. Our wide selection of resistance bands are perfect for all fitness level, from beginner to advanced athletes.